|
Click here to find out the top 15 SQL Server books purchased by this site's visitors! NEW |
| Want to keep in touch with the latest in SQL Server world? Email vyaskn@hotmail.com with 'subscribe' in the subject line |
|
Review of AdventNet SwisSQL Data Migration Tool 3.0
On previous occasions I have reviewed SwisSQL SQL Server to Oracle Migration Edition and SwisSQL Sybase to SQL Server Migration Tool. Now its time to look at yet another new product from SwisSQL called "Data Migration Tool 3.0". Good thing about this tool is that, it is more like a simple wizard, that takes you through the migration process in a clearly defined step by step approach. Compared to the previously reviewed tools, the user interface provided by this tool is much more appealing and is easy to use. |
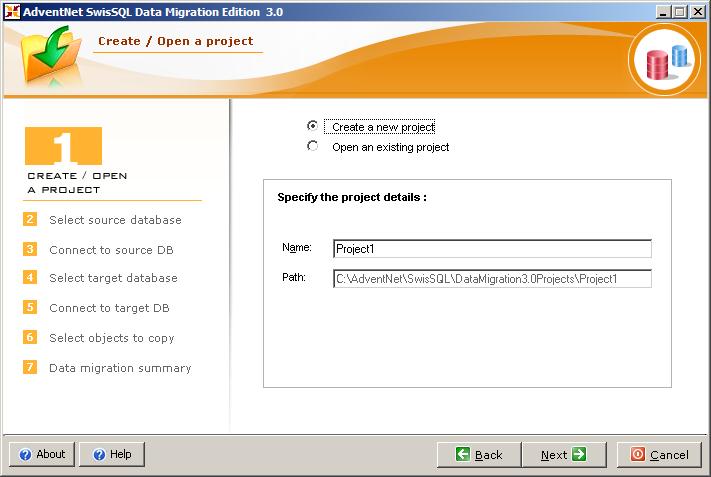
Now I will walk you through the steps of migrating tables, indexes and data from one RDBMS to another RDBMS. As you can see from the first screen shot, this tool provides a wizard based user interface. And you can clearly see on the left hand side of the window that there are 7 steps involved in the migration process. In the first screen you either have to create a new migration project or select an existing project file, and click the Next button.
This leads you to step 2, where you select your source database management system. From the 'Select source database' combo box, select your database server instance, which can be either Oracle 8i, 9i, 10g or SQL Server 7.0, 2000, 2005 or Sybase ASE 11.x, 12.x or DB2 UDB 7.x, 8.x or MySQL 3.23.x, 4.x, 5.x or MaxDB 7.5. The screenshot of this screen is shown below:
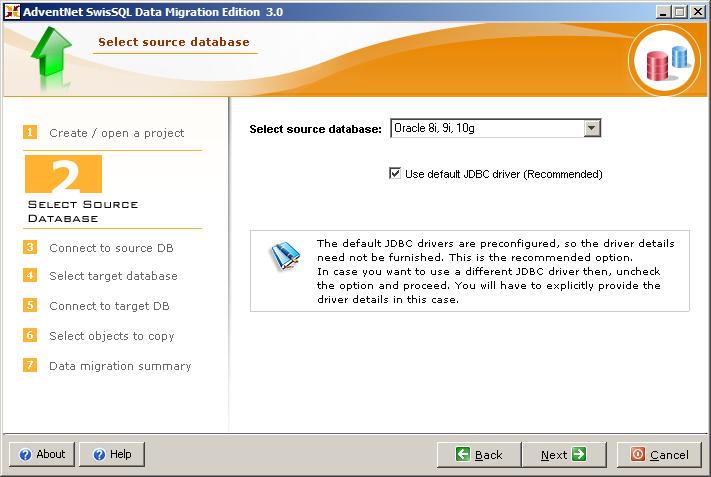
After selecting your source database management system, click Next button. This leads you to step 3. In this step lets you specify the connectivity information for your source database. Here, you will specify information like the database server name, login and password for connecting to your database server, the database name, and an optional port number. The wizard automatically picks the default port number for the specified database system. Screenshot for Step 3 is shown below:
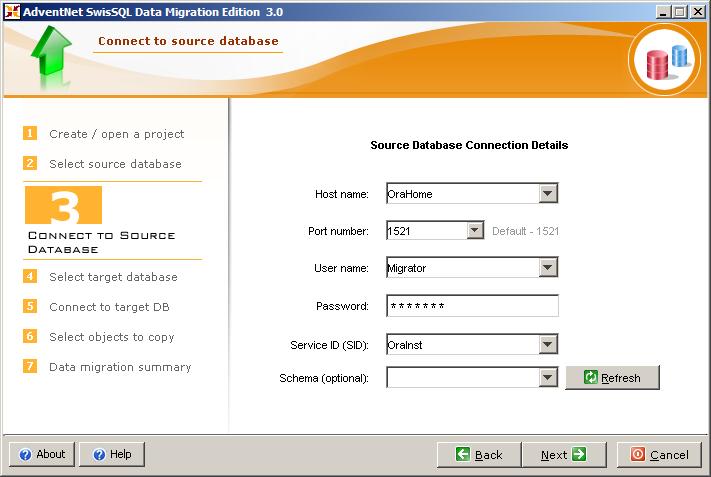
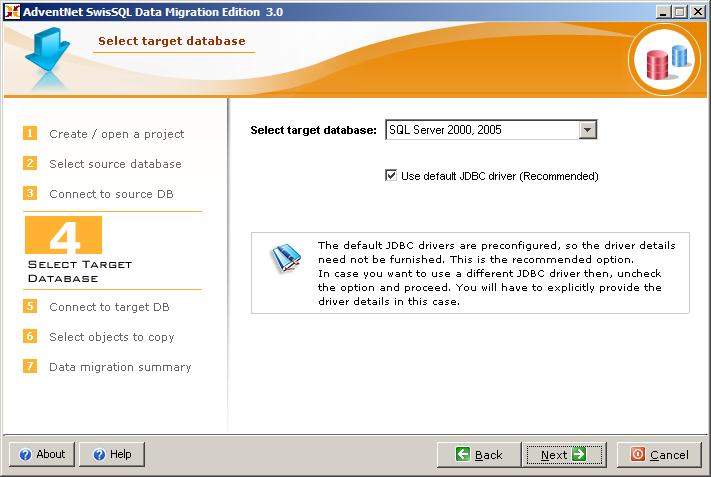
Specify the required connectivity information for your source database system and click Next button. This leads you to step 4. In this step, you have to select your target database management system. Pick the target database management system from the 'Select target database' combo box, which provides a list of support RDBMSs. Screenshot of step 4 is shown below:
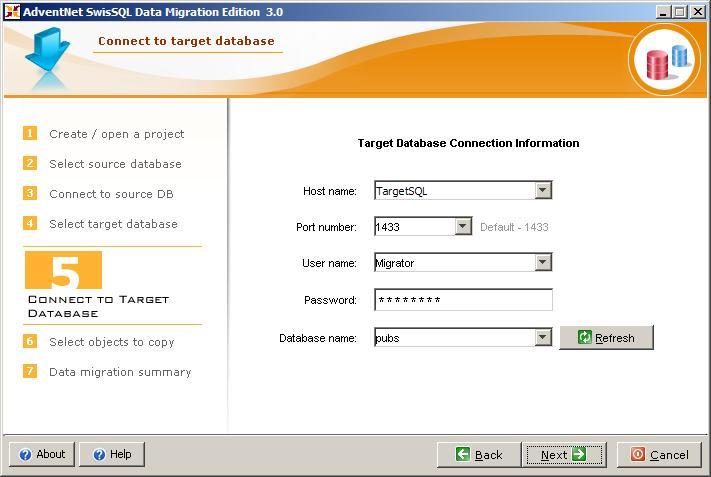
Select your target database system, and click the Next button to go to step 5, where you specify the connectivity information for your target database. Here you will provide the server name, database name, login, password, port number etc. Screenshot of step 5 is shown below:
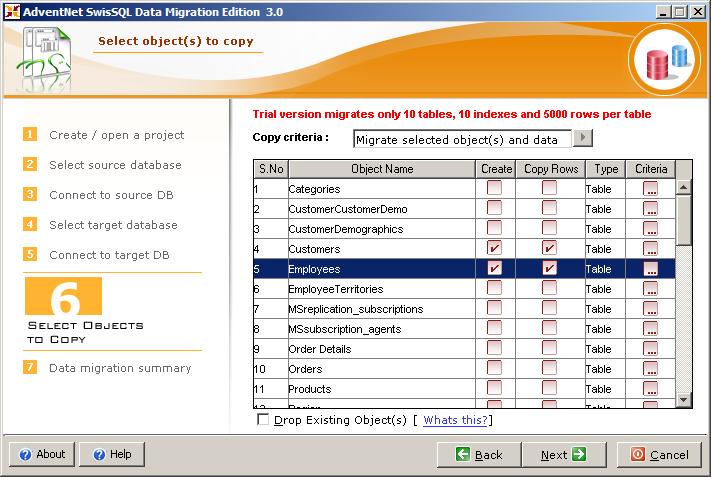
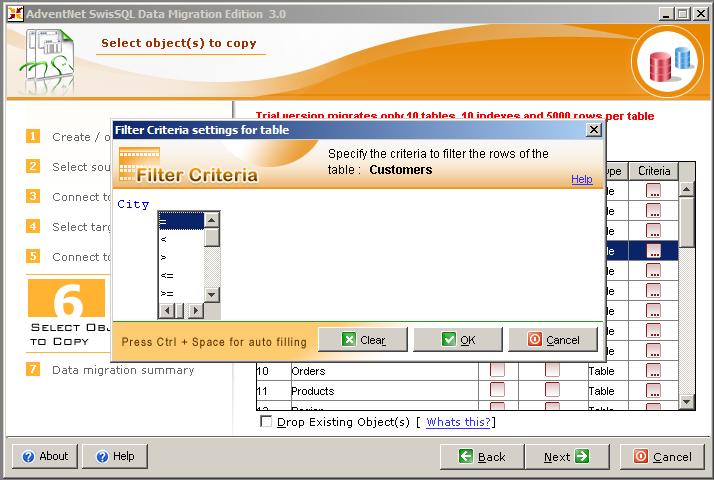
Provide the required connectivity information and click the Next button to go to step 6.This step lets you select the tables, data and indexes from your source database connection, that you want to migrate to your target database system. Here you can specify whether you want to drop the object if it already exists on the target system. This screen also lets you specify the criteria for data to be transferred. Basically you will provide the WHERE clause for the table to specify which rows qualify for migration. In the criteria dialog box, you can press Ctrl + Space to get a list of comparison operators like >, <, = etc. Screenshots for this screen and provided below:
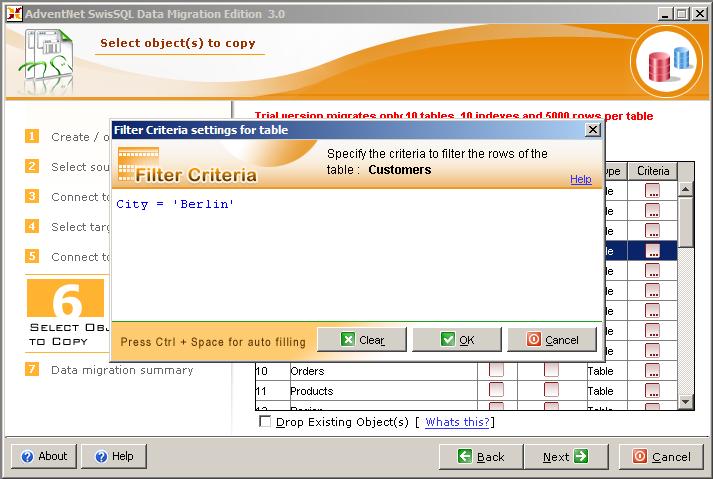
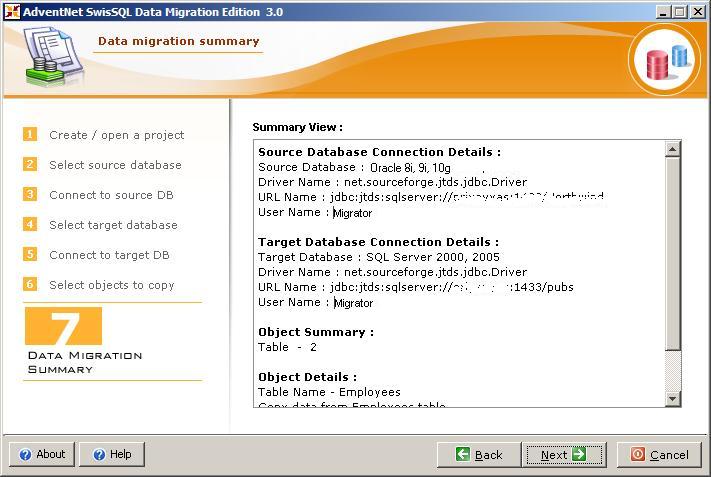
Select the tables, indexes and specify the required data filtering criteria in the above screen. Click the Next button to go to step 7. In this step, the wizard summarizes your selection of source and target servers and databases and the tables and data that you have chosen to migrate. Click Next button on this screen to perform the migration. In step 7, the wizard looks as shown below:
When you press the Next button on the above screen, the actual migration takes place. The last screen shows the progress of migration as it happens, along with success/failure of individual object transfers, and the total time taken by the process. This screen has a Details button. When clicked, it shows you information about your source and target servers and the objects that you've chosen to migrate. The Summary button shows you details of the transfer of individual objects. This screen is pasted below:
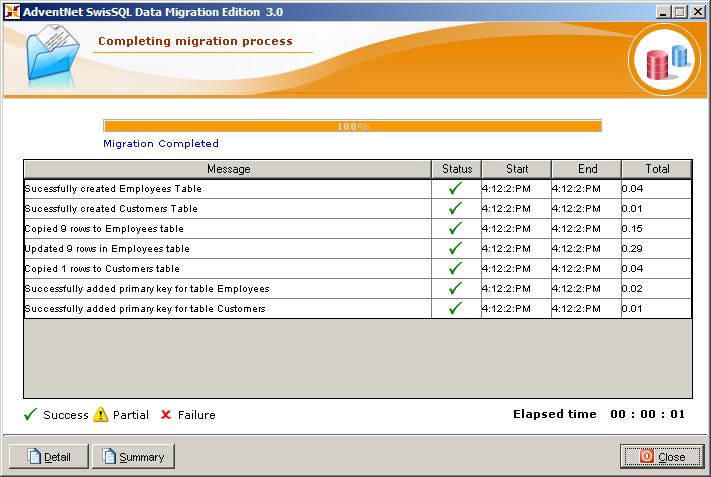
Now you can connect to your target database server and check to make sure all the objects are transferred correctly. I checked my target server, and all the objects that I selected, got transferred correctly.
This product is a big step forward by SwisSQL, as it simplifies the process of migration, with much better user interface, compared to its previous products. The user interface looks very much similar to the well known, SQL Server DTS data transfer wizard.
Well, this is it for now. You can download a free evaluation version of AdventNet SwisSQL Data Migration Tool 3.0 from here. Note that SwisSQL provides free technical support during the evaluation period.